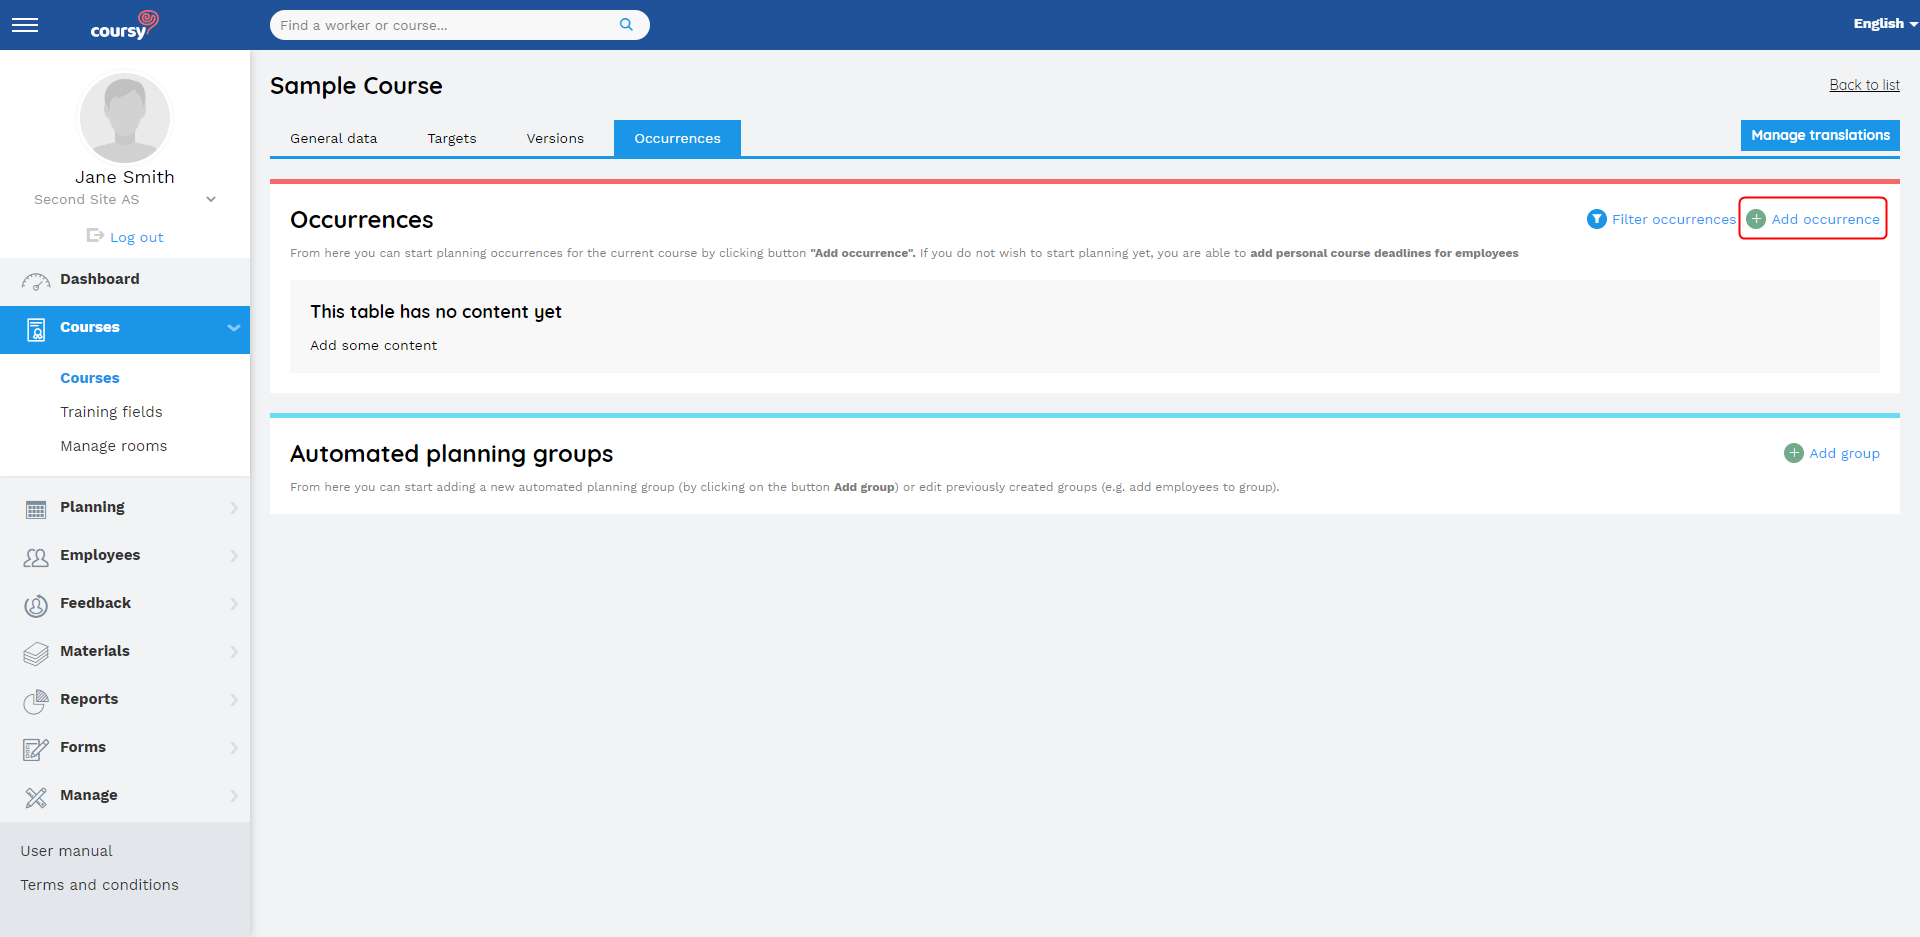
For employees to take a course, it needs to have an occurrence created. To start putting together an occurrence, use the Add occurrence button in the Occurrences tab of course detail view.
General data
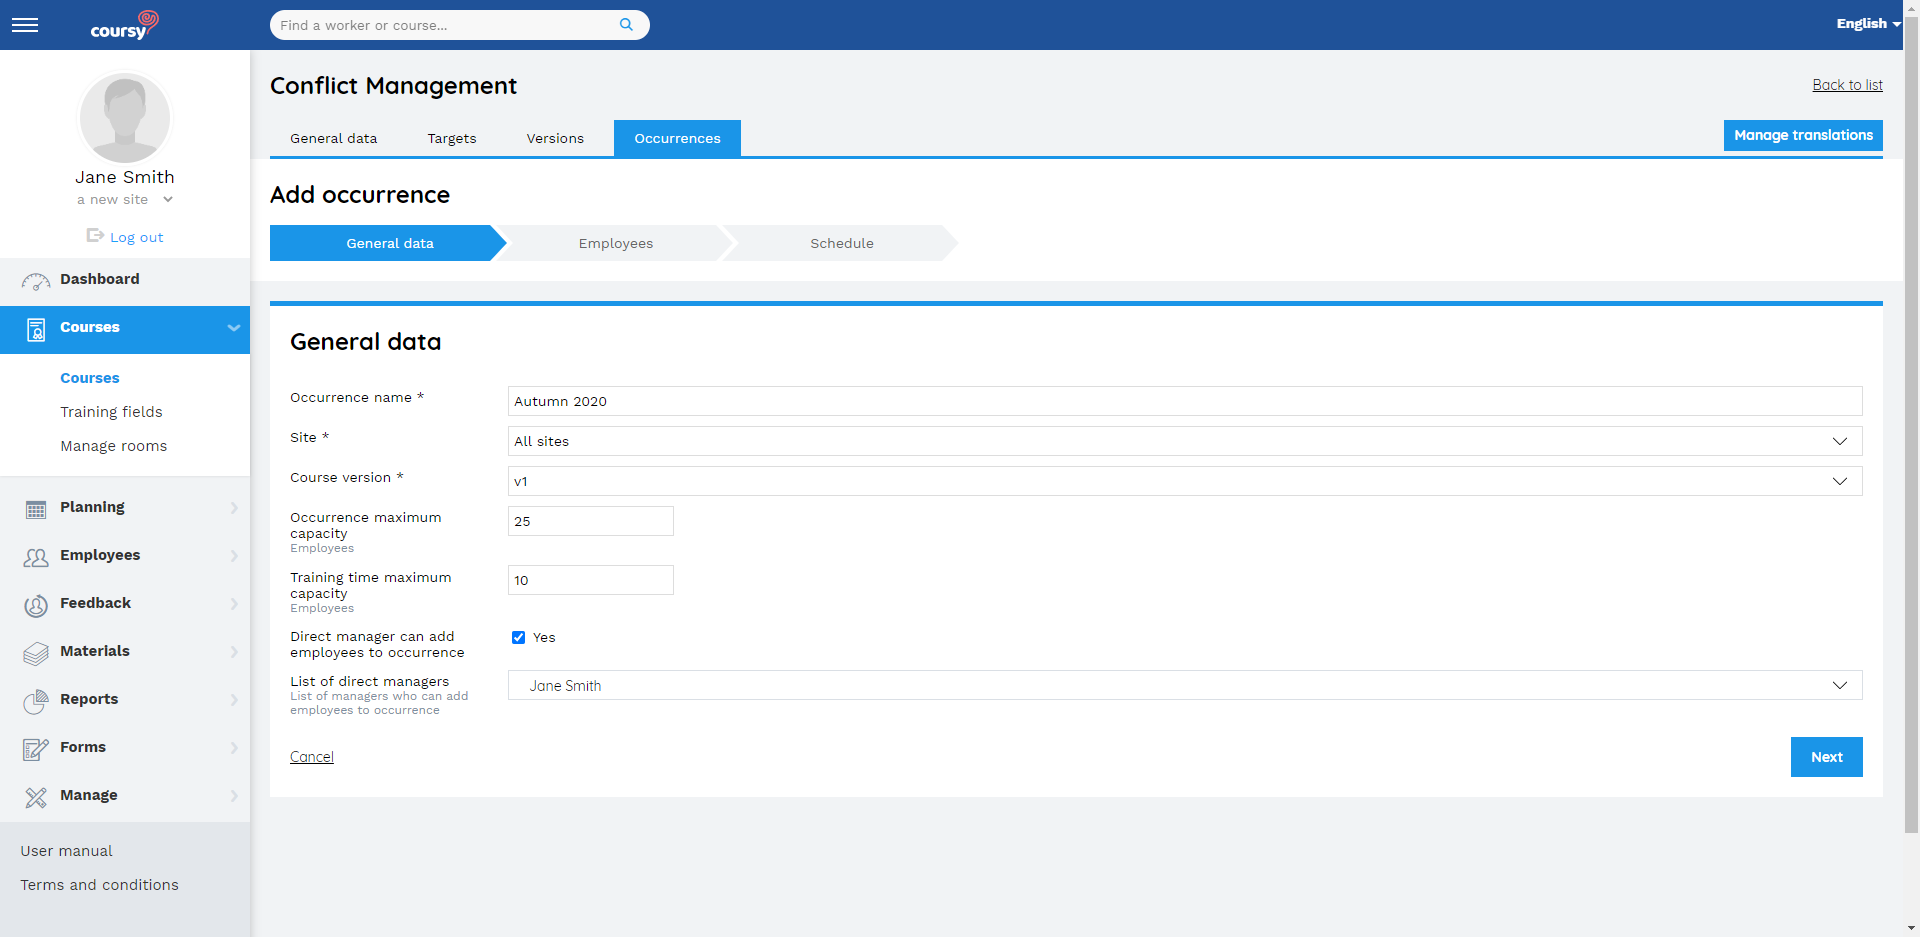
First off, you need to enter general data for the occurrence. General data consists of:
- Occurrence name – The name of the occurrence won’t be seen in Employee Portal and is only for TMS users to differentiate between occurrences.
- Site – Choose the site where the employees you wish to train, belong to.
- Course version – The version determines course trainings, study materials and whether the order of trainings is fixed or not.
- Occurrence maximum capacity (optional) – Use this option to dictate how many employees you plan to include in the occurrence. This field does not prohibit TMS users from adding more employees than the maximum capacity – it only gives a warning (that can be ignored).
- Training time maximum capacity (optional) – Determines the maximum number of participants for a training time. This field does not prohibit TMS users from adding more employees than the maximum capacity – it only gives a warning (that can be ignored).
- Direct manager can add employees to occurrence (optional) – Check this checkbox if you wish to allow some direct managers to add employees to the occurrence. You can select who exactly is allowed to add employees to the occurrence from the List of direct managers field.
After having entered the general data, click Next to open the view of adding employees to the occurrence.
Adding employees to an occurrence
The users listed in the Employees tab are the employees who have been added to the occurrence. This means that when adding a new occurrence, the list is initially empty.
Adding employees
- Click Add more employees
- Check the checkboxes of the employees you wish to add (the checkbox in the header enables you to check/uncheck all the checkboxes of the current page)
- Click Add
NB! The list of employees is paginated, and you can only add the employees on the same page at the same time. If the employees you wish to add are located on different pages, add the employees on the first page before moving on to the next page. You can choose how many entries are displayed on one page from the field above the list of employees.
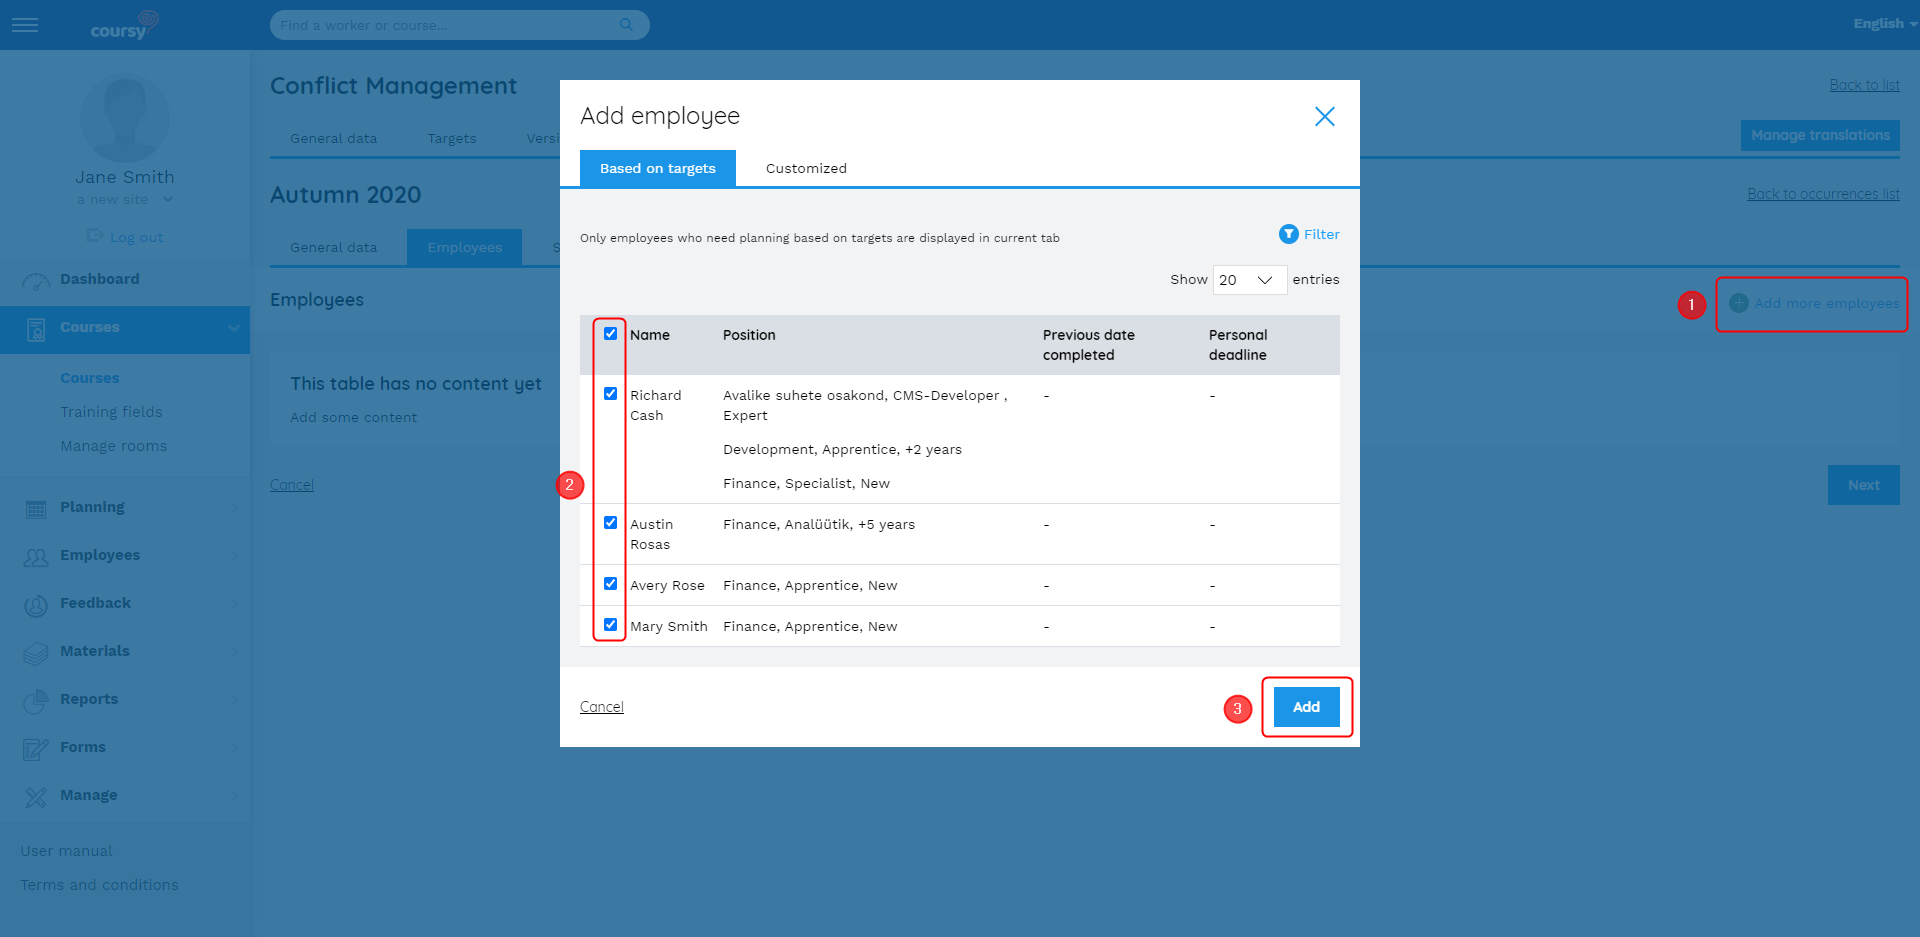
To make the process of adding employees to the occurrence as convenient as possible, the Based on targets and Customized tabs are built up as follows
- The Based on targets tab displays only the employees who need planning based on course targets and the list is sequenced by personal deadline (in ascending order)
- Personal deadline is the date by which the employee needs to complete the course (it can be set in the Training needs view)
- Employees who have been added to a future occurrence (a published occurrence that has at least one training time or deadline with a future date) are not considered as employees who need planning. Therefore, these employees are not displayed in the Based on targets tab (they can still be added from the Customized tab if necessary)
- The Customized tab has the option to sort out employees by name, position, and status. Additionally, it’s possible to sort out only the employees who don’t have a personal deadline for the course (by using the Display only employees without a personal deadline checkbox)
- If you chose a specific site for the occurrence in the General data view, then only the employees of that site will be displayed
- Also, the employees who have already been added to the current occurrence are not displayed
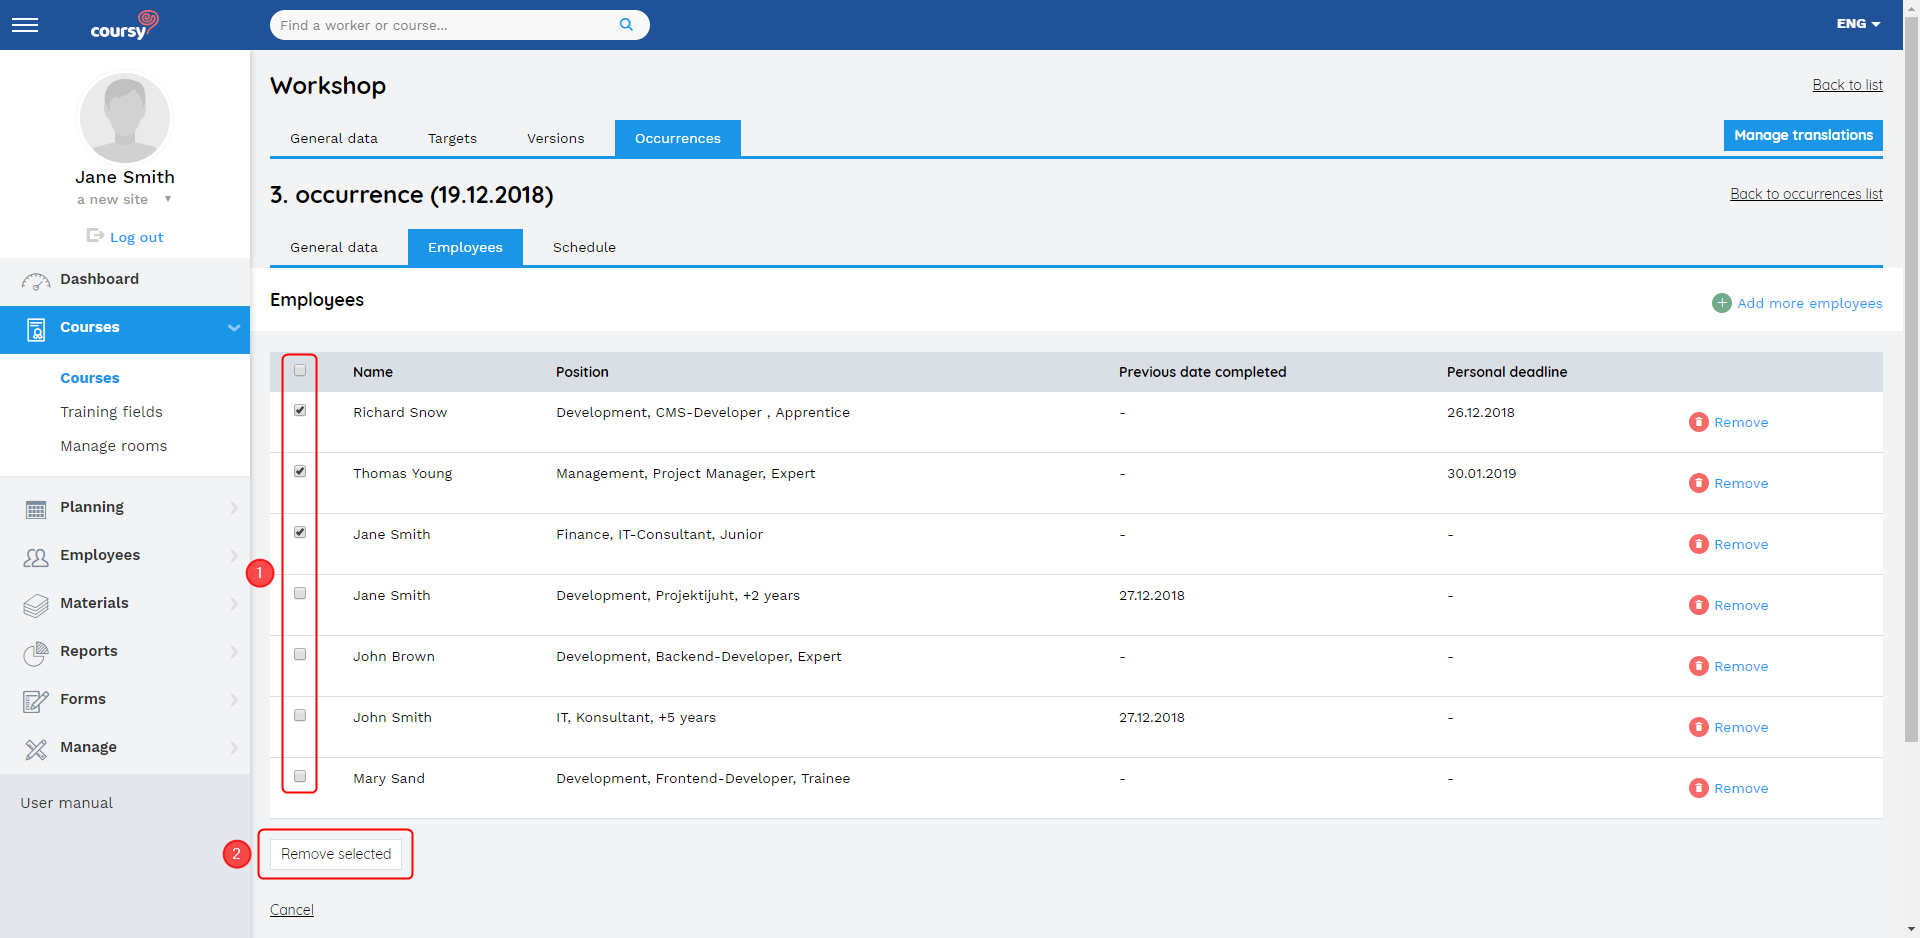
Removing employees from the occurrence
You can remove employees from the occurrence one by one (the Remove button) or by bulk. To remove multiple employees at the same time, check their checkboxes and click Remove selected.
Occurrence schedule
Schedule is based on the trainings put together for the course earlier. There are different types of trainings
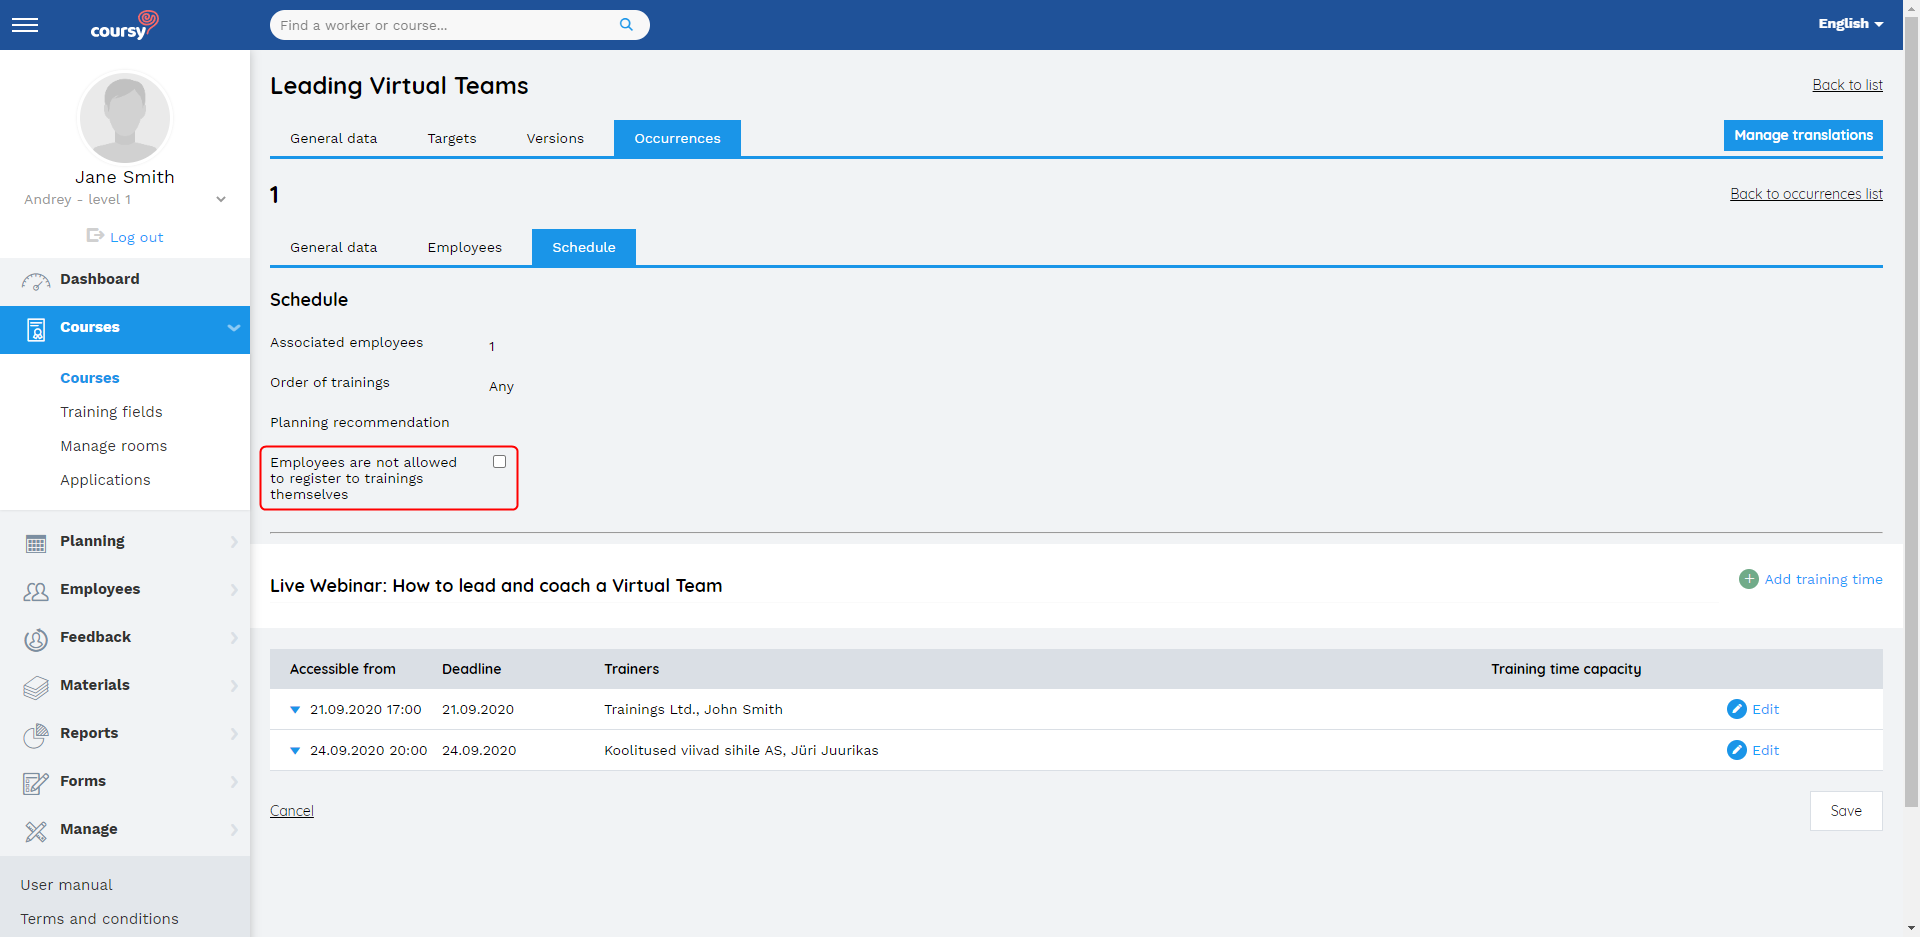
For classroom and webinar type trainings, you can choose whether the employees are allowed to register themselves to the training times or not. By default, the employees are allowed to register themselves to the training times. To change that, check the Employees are not allowed to register to trainings themselves checkbox.
Online trainings
You can add a deadlines and trainers for online trainings in the occurrence’s Schedule tab.
If the employee has not passed the online training before the deadline then the system marks the training as “Not passed”. Adding the deadline is optional. If you leave the deadline blank, then the employee has no time limit for completing the training.
Adding the trainer is also optional. You can, for example, add as the trainer the contact person who the employee can turn to if they have any questions about the study material.
Classroom trainings
To conduct a classroom training, you need to add a training time where you define the following information:
- When the training takes place
- Where the training takes place (the training room)
- In the Manage rooms menu item, you can also add a location to the room that the employees can view on the map in the Employee Portal.
- The trainer or training company who conducts the training
It’s possible to add multiple training times for a classroom training. Adding multiple training times is necessary when the same training will be conducted on multiple occasions. The employee needs to take part in one of the training times to successfully pass the training.
The system marks the training as passed for the employee after the TMS user marks the employee as participated in the training time and confirms the participation protocol.
The system marks the end date of the training time as the date when the employee passed the training.
Test type trainings
To conduct a test type training, you need to add a test time.
While adding the test time, use the Accessible from and Deadline fields to set the time period when the test is accessible for the employees.
If the test is meant to be taken in a certain location (the Room mandatory checkbox is checked in the form’s settings), then you also need to add the training room and a trainer or training company.
To give the employee access to the test, you need to assign them as participants in the test time. If the test’s form has the Room mandatory checkbox checked, then you also need to mark the employee as participated and confirm the participation protocol.
If you have attached a feedback form with the test, then add the deadline for the feedback. The option to give feedback will be displayed after the employee has submitted their answers to the test (on the results page).
Webinar type trainings
For the webinar, you need to add a training time where you define the following information:
- When the webinar takes place
- The URL address that takes the employee to the webinar’s platform
- Webinar title – this will be the name of the button that directs the employee to the URL address that you set on the previous field
- The trainer or training company who conducts the webinar
It’s possible to add multiple training times for the webinar. Adding multiple training times is necessary when the same webinar will be conducted on multiple occasions. The employee needs to take part in one of the training times to successfully pass the webinar.
The system marks the webinar as passed for the employee after the TMS user marks the employee as participated in the training time and confirms the participation protocol.
The system marks the end date of the training time as the date when the employee passed the webinar.
Feedback trainings
In the Schedule view, you can set the deadline for the feedback training. The deadline is editable until it’s still in the future.
After you publish the occurrence, the system creates a survey group for the feedback training where you can view the employees’ submissions.
Training times
To plan classroom trainings, webinars, and tests, you need to add training times (at least one training time for each training). To add a new training time, click Add training time or Add test time and fill out the mandatory fields. Trainings can have multiple training times.
If the Employees are not allowed to register to trainings themselves checkbox is unchecked in the occurrence’s Schedule tab, then the employees (who are registered to the occurrence) can also register themselves to the training times of classroom trainings or webinars from the Employee Portal.
On the contrary, when planning tests, it’s important to assign the participants from Coursy TMS – the test will only be accessible to the employees who have been added to the training time. If the test room has been set as mandatory in the form’s settings, then you also need to mark the employee as participated in the training time and confirm the participation protocol to give the employee access to the test.
Assigning employees to training times in Coursy TMS
- Click the blue arrow next to the training’s starting time (this opens the list of participants)
- Click Assign participants to open the list of all the employees who have been added to the occurrence (and who have not been assigned as participants in another training time of the same training)
- Check the check-boxes next to the employees you wish to add as participants
- Click Save

Publishing the occurrence
When all the training times have been added and (optionally) employees have been assigned to training times for the whole schedule of the course, the occurrence is ready to be published.
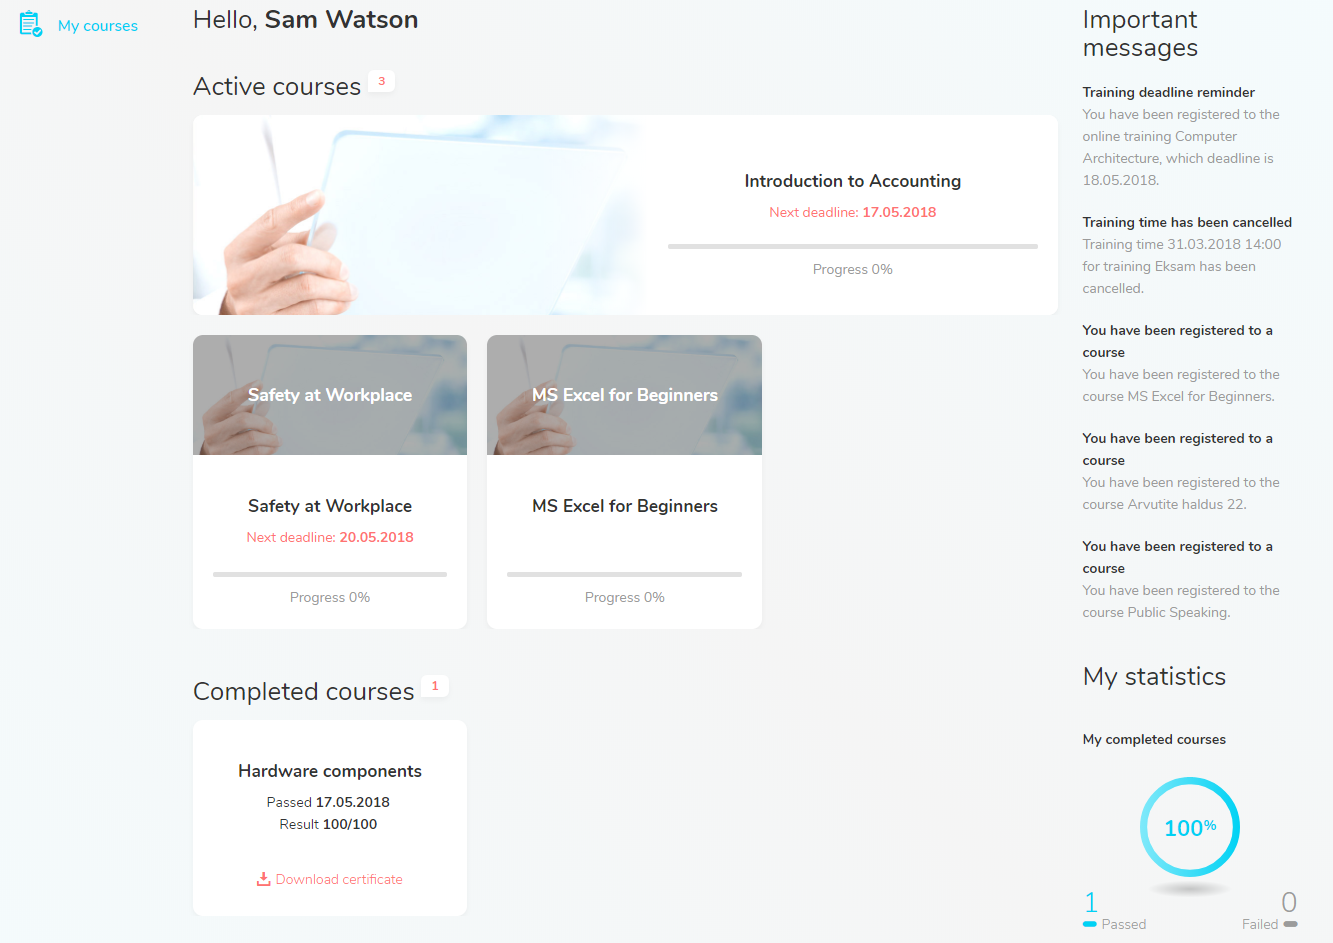
After publishing, the occurrence becomes visible in the Employee Portal. Courses that are yet to be completed, appear under Active courses.
Here is an example of how published occurrences are displayed in the Employee Portal (for users who have been added to the occurrence).